Installation - Transfer Case
Transfer Case

Transfer Case - Left Side
Transfer Case - Right Side
Transfer Case - Left Side - Mechanical Shift-On-The-Fly (MSOF) Linkage
All vehicles
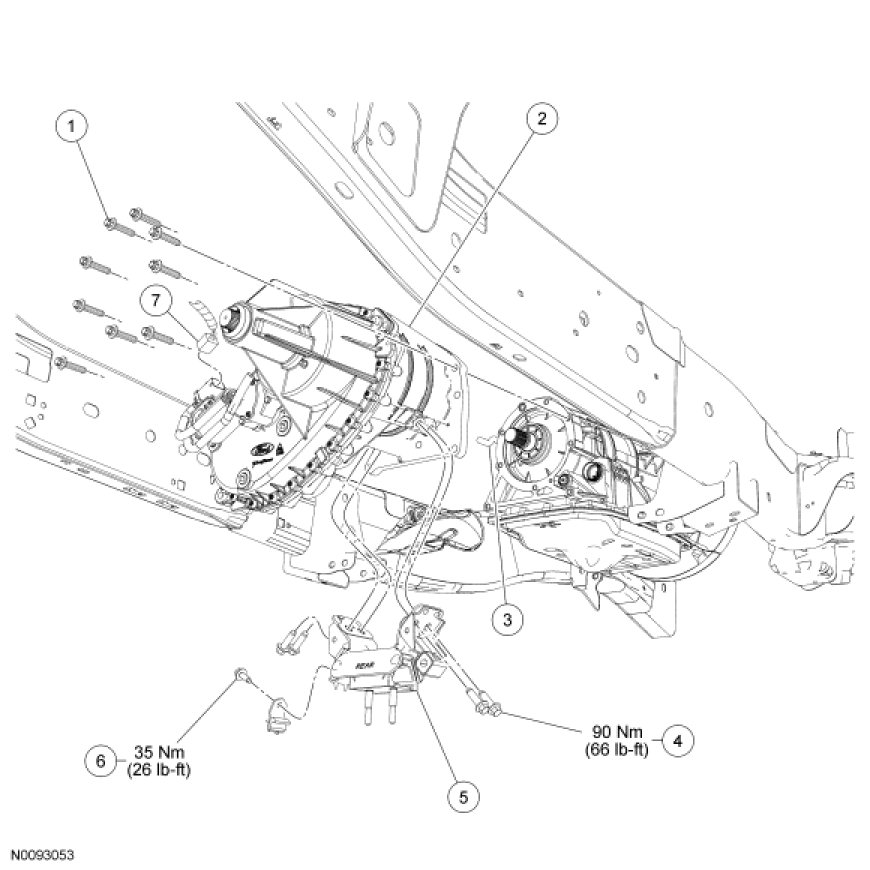
1. Position the transfer case to the transmission and onto the output shaft. With the transfer case 25.4 mm (1 in) from the transmission, push the transfer case to the transmission.
2. NOTE: Do not reuse the old transfer case-to-transmission bolts.
Install 9 new transfer case-to-transmission bolts.
- Tighten the bolts evenly in a cross pattern to 17 Nm (150 lb-in).
3. Install the transmission mount and the 4 transmission mount bolts.
- Tighten to 90 Nm (66 lb-ft).

4. Install the LH exhaust support bracket and bolt.
- Tighten to 35 Nm (26 lb-ft).

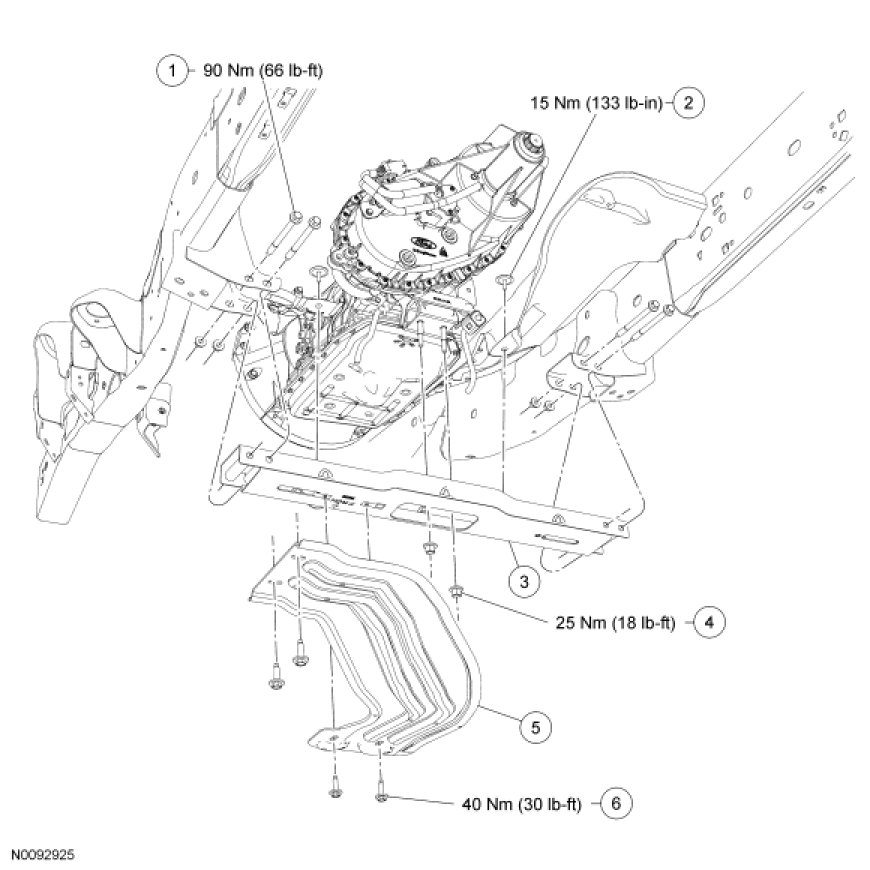
5. Position the crossmember and the 2 transmission mount nuts.
- Do not tighten at this time.

6. Install the 4 crossmember bolts and nuts.
- Tighten the crossmember bolts to 90 Nm (66 lb-ft).
- Tighten the transmission mount nuts to 25 Nm (18 lb-ft).

7. Install the LH exhaust heat shield bolt to the crossmember.
- Tighten to 15 Nm (133 lb-in).

8. Install the RH exhaust heat shield bolt to the crossmember.
- Tighten to 15 Nm (133 lb-in).

9. Connect the vent hose to the transfer case.

Vehicles with Electronic Shift-On-The-Fly (ESOF)
10. Connect the shift motor electrical connector and attach the 2 harness retainer clips to the transfer case.

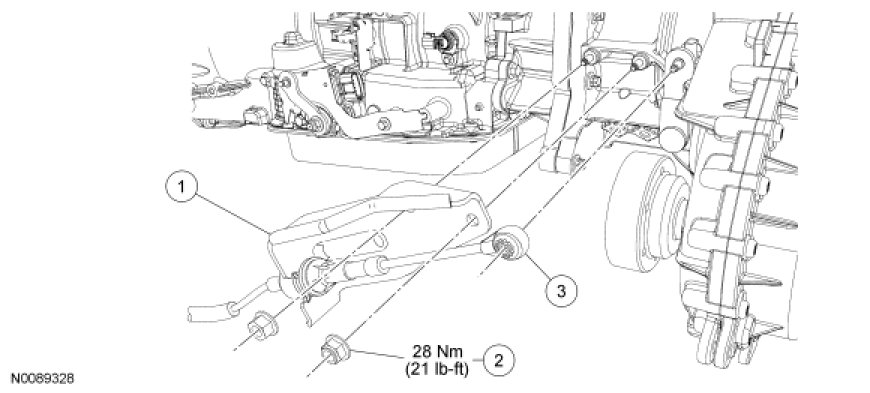
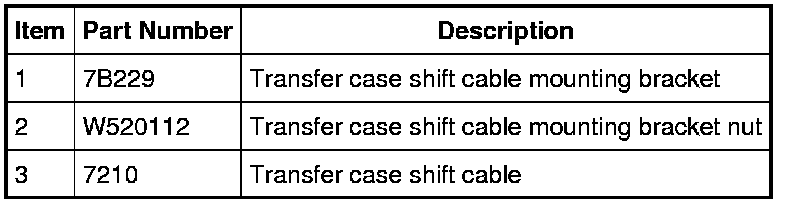
Vehicles with Mechanical Shift-On-The-Fly (MSOF)
11. Install the shift cable mounting bracket and the 2 nuts.
- Tighten to 28 Nm (21 lb-ft).
12. Connect the cable end to the shift lever.
All vehicles
13. NOTE: Align the index marks made during removal.
Install the rear driveshaft.
14. NOTE: Align the index marks made during removal.
Install the front driveshaft.
15. If drained, fill the transfer case. For additional information, refer to Transfer Case Draining and Filling Procedures in the General Procedures.
16. If equipped, position the skid plate and install the 4 skid plate bolts.
- Tighten to 40 Nm (30 lb-ft).
